更新软件
更新软件包列表并升级已安装的软件包
apt update -y && apt install wget curl sudo unzip git -y
如果出现证书不信任的情况,请在wget后加上–no-check-certificate
wget --no-check-certificate -O- https://raw.githubusercontent.com/zhucaidan/swap.sh/main/swap.sh && bash swap.sh
刷新配置
安装完成某项应用后可能出现“command not found”,刷新配置后重新连接ssh一般可以解决
source /etc/profile
查看CPU信息
cat /proc/cpuinfo
查看当前内核信息
uname -a
AlmaLinux更换为阿里云源
备份原文件
cp -r /etc/yum.repos.d/ /etc/yum.repos.d_bak
执行以下命令完成换源
sed -e 's|^mirrorlist=|#mirrorlist=|g' \
-e 's|^# baseurl=https://repo.almalinux.org|baseurl=https://mirrors.aliyun.com|g' \
-i.bak \
/etc/yum.repos.d/almalinux*.repo
关键字查找进程
ps -ef | grep <进程关键字>
Debian关闭IPv6
cd /etc/sysctl.d/
touch disable-ipv6.conf
echo net.ipv6.conf.all.disable_ipv6=1 > disable-ipv6.conf
执行以下命令以生效
sysctl -p -f /etc/sysctl.d/disable-ipv6.conf
内核更改
开启BBR,更换BBRplus等
脚本来自:https://blog.ylx.me/archives/783.html
BBR3启用方法:使用不卸载内核版本的脚本,选择安装xanmod官方最新内核,重启后选择使用bbr+fq加速再次重启即可
卸载内核版本
wget -O tcp.sh "https://github.com/ylx2016/Linux-NetSpeed/raw/master/tcp.sh" && chmod +x tcp.sh && ./tcp.sh
镜像(国内机器或ipv6 only请使用这个)
wget -N --no-check-certificate "https://dl.233.mba/d/sh/tcp.sh" && chmod +x tcp.sh && ./tcp.sh
不卸载内核版本
wget -N --no-check-certificate "https://dl.233.mba/d/sh/tcp.sh" && chmod +x tcp.sh && ./tcp.sh
镜像(国内机器或ipv6 only请使用这个)
wget -N --no-check-certificate "https://dl.233.mba/d/sh/tcpx.sh" && chmod +x tcpx.sh && ./tcpx.sh
一键DD重装系统 bin456789
亮点
- 默认使用官方安装程序,不满足安装程序内存要求时,将使用官方云镜像 (Cloud Image)
- 不含第三方链接和自制包,所有资源均实时从源站点获得
- 适配 512M + 5G 小鸡,并支持 256M 小鸡安装 Alpine
- 支持用官方 iso 安装 Windows (不支持 ARM)
- 支持 Windows 重装成 Linux,也可重装 Windows
- 支持 BIOS、EFI、ARM (ARM 不支持安装 Windows)
- 原系统分区支持 LVM、Btrfs
- 支持安装 Alpine、Arch、openSUSE、Gentoo,也可从这些系统安装
- 可通过 SSH、浏览器、串行控制台、后台 VNC 查看 DD、云镜像安装进度
- 有很多注释
Linux 下使用
下载
curl -O https://raw.githubusercontent.com/bin456789/reinstall/main/reinstall.sh
简单使用方法
bash reinstall.sh centos   7|8|9  (8|9 为 stream 版本)
                  alma     8|9
                  rocky    8|9
                  fedora   37|38
                  debian   10|11|12
                  ubuntu   20.04|22.04
                  alpine   3.16|3.17|3.18
                  opensuse 15.4|15.5|tumbleweed (只支持云镜像)
                  arch     (只支持 amd64 云镜像)
                  gentoo   (只支持 amd64 云镜像)

                  不输入版本号,则安装最新版

可选参数:         --ci     强制使用云镜像
更多脚本功能请参阅:https://github.com/bin456789/reinstall
LloydAsp(OpenVZ/LXC VPS专用脚本)
Github:https://github.com/LloydAsp/OsMutation
使用方法:
wget -qO OsMutation.sh https://raw.githubusercontent.com/LloydAsp/OsMutation/main/OsMutation.sh && chmod u+x OsMutation.sh && ./OsMutation.sh
硬盘可用空间小于1GiB的请使用(实验性功能):
wget -qO OsMutation.sh https://raw.githubusercontent.com/LloydAsp/OsMutation/main/OsMutationTight.sh && chmod u+x OsMutation.sh && ./OsMutation.sh
仅支持OpenVZ 7及以上版本,不支持虚拟机(KVM、Xen、Vmware等架构)
萌咖
dd安装debian10 64位示例
bash <(wget --no-check-certificate -qO- 'https://dl.233.mba/d/sh/InstallNET.sh') -d 10 -v 64 -a -p {自定义密码} --mirror {自定义镜像源}
dd安装win2019server示例(示例采用nat.ee大佬的镜像,默认端口3389,账户Administrator,密码nat.ee)
wget --no-check-certificate -qO InstallNET.sh 'https://dl.233.mba/d/sh/InstallNET.sh' && bash InstallNET.sh -dd 'https://dl.233.mba/yilai/win2019server-enus/winsrv2019-data-x64-us.vhd.gz'
dd安装群晖6.17(ds3617xs):(来源https://hostloc.com/thread-1006309-1-1.html)
Linux修改主机名
首先执行,例如hostnamectl set-hostname wrnxr
hostnamectl set-hostname
然后执行下面的命令,修改原主机名为刚刚设置的
vi /etc/hosts
最后输入reboot重启机器
综合工具箱(强烈推荐,集成了很多脚本)
wget -O box.sh https://raw.githubusercontent.com/BlueSkyXN/SKY-BOX/main/box.sh && chmod +x box.sh && clear && ./box.sh
科技 lion
apt update -y  && apt install -y curl
bash <(curl -sL kejilion.sh)
TG 中文汉化
https://t.me/setlanguage/classic-zh-cn
甲骨文 DD 脚本
DD 成 Debian 10
bash <(wget --no-check-certificate -qO- 'https://raw.githubusercontent.com/MoeClub/Note/master/InstallNET.sh') -d 10 -v 64 -p "自定义root密码" -port "自定义ssh端口"
DD 成 Ubuntu 20.04
bash <(wget --no-check-certificate -qO- 'https://raw.githubusercontent.com/MoeClub/Note/master/InstallNET.sh') -u 20.04 -v 64 -p "自定义root密码" -port "自定义ssh端口"
测试 IPv4 优先还是 IPv6 优先
curl ip.p3terx.com
极光面板
bash <(curl -fsSL https://raw.githubusercontent.com/Aurora-Admin-Panel/deploy/main/install.sh)
网络调优篇TCP
一般安装BBR原版内核+FQ优化,然后 >22. 系统配置优化新,就可以,喜欢折腾的,可以>61. 手动提交合并内核参数,手动调优。
证书环境:
apt-get install ca-certificates wget -y && update-ca-certificates
脚本:
wget -O tcpx.sh "https://github.com/ylx2016/Linux-NetSpeed/raw/master/tcpx.sh" && chmod +x tcpx.sh && ./tcpx.sh
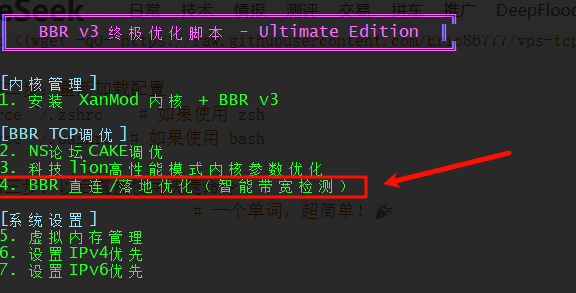
TCP调优脚本-甲骨文
项目地址:https://github.com/Eric86777/vps-tcp-tune
# 第一步:安装别名(只需执行一次)
bash <(wget -qO- https://raw.githubusercontent.com/Eric86777/vps-tcp-tune/main/install-alias.sh)

# 第二步:重新加载配置
source ~/.zshrc   # 如果使用 zsh
source ~/.bashrc  # 如果使用 bash

# 第三步:以后直接使用快捷命令
bbr               # 一个单词,超简单!🎉

选择4即可
一键安装KMS服务器
系统支持:CentOS 6+,Debian 7+,Ubuntu 12+
内存要求:≥128M
1、本脚本适用于三大Linux发行版,其他版本则不支持。
2、KMS服务安装完成后会加入开机自启动。
3、默认记录日志,其日志位于/var/log/vlmcsd.log
官方脚本:
wget --no-check-certificate https://github.com/teddysun/across/raw/master/kms.sh && chmod +x kms.sh && ./kms.sh
镜像:
wget --no-check-certificate https://dl.233.mba/d/sh/kms.sh && chmod +x kms.sh && ./kms.sh
安装完成后需要放行1688端口
使用以下命令查看监听情况
netstat -nxtlp | grep 1688
脚本指令:
启动:/etc/init.d/kms start

停止:/etc/init.d/kms stop

重启:/etc/init.d/kms restart

状态:/etc/init.d/kms status

卸载:./kms.sh uninstall
iptables一键转发脚本
wget --no-check-certificate https://dl.233.mba/d/sh/iptables.sh && bash iptables.sh
一键开启Swap脚本
特点:一键开启,包含删一键添加与删除功能
wget --no-check-certificate https://dl.233.mba/d/sh/swap.sh && bash swap.sh
wget https://raw.githubusercontent.com/zhucaidan/swap.sh/main/swap.sh && bash swap.sh
Aria2一键安装脚本
Aria2 是目前最强大的全能型下载工具,它支持 BT、磁力、HTTP、FTP 等下载协议,常用做离线下载的服务端。Aria2 一键安装管理脚本是 Toyo (逗比) 大佬最为知名的脚本作品之一,2018年11月14日逗比大佬因未知原因突然失联。由于作者非常喜欢 Aria2 所以自2018年12月7日起开始接手这个项目并进行了大量的功能与细节优化,一直持续维护至今。增强版脚本整合了 Aria2 完美配置,在安装 Aria2 的过程中会下载这套配置方案,这套方案包含了配置文件、附加功能脚本等文件,用于实现 Aria2 功能的增强和扩展,提升 Aria2 的下载速度与使用体验,解决 Aria2 在使用中遇到的 BT 下载无速度、文件残留占用磁盘空间、任务丢失、重复下载等问题。
Github:https://github.com/P3TERX/aria2.sh
wget -N git.io/aria2.sh && chmod +x aria2.sh && ./aria2.sh
镜像
wget -N https://dl.233.mba/d/sh/aria2.sh && chmod +x aria2.sh && ./aria2.sh
网络 & IP 管理
DNS 解析问题
写入 DNS 配置
sudo tee /etc/resolv.conf <<EOF
nameserver 8.8.8.8
nameserver 1.1.1.1
nameserver 2001:4860:4860::8844
nameserver 2606:4700:4700::1111
EOF
锁定 DNS 配置(防止被修改)
sudo chattr +i /etc/resolv.conf
解锁 DNS 配置
sudo chattr -i /etc/resolv.conf
测试脚本
融合怪测评脚本
融合怪测评脚本Github地址:https://github.com/spiritLHLS/ecs
有交互形式
curl -L https://gitlab.com/spiritysdx/za/-/raw/main/ecs.sh -o ecs.sh && chmod +x ecs.sh && bash ecs.sh

无交互形式
echo 1 | bash <(wget -qO- --no-check-certificate https://gitlab.com/spiritysdx/za/-/raw/main/ecs.sh)
IP质量测试独立脚本
bash <(wget -qO- --no-check-certificate https://gitlab.com/spiritysdx/za/-/raw/main/qzcheck.sh)
或
bash <(wget -qO- bash.spiritlhl.net/ecs-ipcheck)
或
bash <(wget -qO- --no-check-certificate https://raw.githubusercontent.com/spiritLHLS/ecs/main/qzcheck.sh)
镜像
bash <(wget -qO- --no-check-certificate https://dl.233.mba/d/sh/qzcheck.sh)
流媒体及IP质量测试
最常用版本
bash <(curl -L -s check.unlock.media)
原生检测脚本
bash <(curl -sL Media.Check.Place)
准确度最高
bash <(curl -L -s https://github.com/1-stream/RegionRestrictionCheck/raw/main/check.sh)
IP质量体检脚本
bash <(curl -sL IP.Check.Place)
一键修改解锁DNS
wget https://raw.githubusercontent.com/Jimmyzxk/DNS-Alice-Unlock/refs/heads/main/dns-unlock.sh && bash dns-unlock.sh
Superbench修改版
原作者找不到,希望知道的人在评论区留言;本站在上面基础上对测速节点进行维护
特点:支持查看Basic system info,Geekbench,besttrace,I/O test,Media Unlock test以及speedtest(2022-2-10v1.3.5又增加了新的测速节点)
bash <(wget --no-check-certificate -O- https://dl.233.mba/d/sh/superbenchpro.sh)
图片[23]-个人常用VPS指令&脚本-仙人小站
v1.3.5
图片[24]-个人常用VPS指令&脚本-仙人小站
v1.3.5
图片[25]-个人常用VPS指令&脚本-仙人小站
图片[26]-个人常用VPS指令&脚本-仙人小站
图片[27]-个人常用VPS指令&脚本-仙人小站
图片[28]-个人常用VPS指令&脚本-仙人小站
图片[29]-个人常用VPS指令&脚本-仙人小站
图片[30]-个人常用VPS指令&脚本-仙人小站
老鬼大佬的SuperBench测试脚本
图片[31]-个人常用VPS指令&脚本-仙人小站
wget -qO- –no-check-certificate https://raw.githubusercontent.com/oooldking/script/master/superbench.sh | bash
镜像(国内机器或ipv6 only请使用这个)
wget -qO- –no-check-certificate https://dl.233.mba/d/sh/superbench.sh | bash
秋水逸冰大佬的UnixBench.sh
图片[32]-个人常用VPS指令&脚本-仙人小站
wget –no-check-certificate https://github.com/teddysun/across/raw/master/unixbench.sh
chmod +x unixbench.sh
./unixbench.sh
镜像(国内机器或ipv6 only请使用这个)
wget –no-check-certificate https://dl.233.mba/d/sh/unixbench.sh
chmod +x unixbench.sh
./unixbench.sh
推荐杜甫使用-本脚本支持查看I/O bench以及system info
支持查看硬件信息,硬盘通电时间,io等脚本,适合独立服务器使用
vps也能用
Github:https://github.com/Aniverse/A
wget -q https://github.com/Aniverse/A/raw/i/a && bash a
图片[33]-个人常用VPS指令&脚本-仙人小站
LemonBench.sh
特点:
服务器基础信息(CPU信息/内存信息/Swap信息/磁盘空间信息等)
流媒体解锁情况
Speedtest网速测试 (本地到最近源及国内各地域不同线路的网速)
磁盘测试(4K块/1M块 直接写入测试)
路由追踪测试(追踪到国内和海外不同线路的路由信息)
Spoofer测试(获取详细网络信息,快速判断服务器接入线路)
图片[34]-个人常用VPS指令&脚本-仙人小站
快速测试:
curl -fsL https://ilemonra.in/LemonBenchIntl | bash -s fast
完整测试:
curl -fsL https://ilemonra.in/LemonBenchIntl | bash -s full
Superspeed多节点测速修改版
特点:节点多,纯测试,修改版新增快速测试
图片[35]-个人常用VPS指令&脚本-仙人小站
原版Github:https://github.com/oooldking/script,本站根据原版进行修改
bash <(curl -Lso- https://dl.233.mba/d/sh/speedtest.sh)
masonr大佬的yabs.sh
特点:支持速度测试,硬盘测试,Geekbench4/5
github:https://github.com/masonr/yet-another-bench-script
官方
wget -qO- yabs.sh | bash
或者
curl -sL yabs.sh | bash
镜像
wget --no-check-certificate https://dl.233.mba/d/sh/yabs.sh && bash yabs.sh
图片[36]-个人常用VPS指令&脚本-仙人小站
部分截图
lmc999大佬的流媒体解锁测试脚本
图片[37]-个人常用VPS指令&脚本-仙人小站
项目地址:https://github.com/lmc999/RegionRestrictionCheck
脚本介绍
本脚本基于CoiaPrant/MediaUnlock_Test代码进行修改
支持OS/Platform:CentOS 6+, Ubuntu 14.04+, Debian 8+, MacOS, Android with Termux
iOS运行方法请参考此处
优化了Disneyplus的判断准确性
新增MyTVSuper解锁判断
新增Dazn解锁判断
新增Hulu Japan解锁判断
新增赛马娘解锁判断
新增舰娘解锁判断
新增Now E解锁判断
新增Viu TV解锁判断
新增U-NEXT VIDEO解锁判断
新增Paravi解锁判断
优化了Abema TV的判断准确性
新增WOWOW解锁判断
新增TVer解锁判断
新增Hami Video解锁判断
新增4GTV解锁判断
新增Sling TV解锁判断
新增Pluto TV解锁判断
新增HBO Max解锁判断
新增Channel 4解锁判断
新增ITV Hub解锁判断
新增爱奇艺国际版区域判断
新增Hulu US解锁判断
新增encoreTVB解锁判断
新增LineTV TW解锁判断
新增Viu.com解锁判断
新增Niconico解锁判断
新增Paramount+解锁判断
新增KKTV解锁判断
新增Peakcock TV解锁判断
新增FOD解锁判断
新增TikTok区域判断
优化YouTube判断增加Premium是否可用判断
新增BritBox解锁判断
新增Amazon Prime Video区域判断
新增Molotov解锁判断
新增DMM解锁判断
新增Radiko解锁及区域判断
新增CatchPlay+解锁判断
新增Hotstar解锁判断
新增Litv解锁判断
新增Fubo TV解锁判断
新增Fox解锁判断
新增Joyn解锁判断
新增Sky Germany解锁判断
新增ZDF解锁判断
新增HBO GO Asia解锁判断
新增HBO GO Europe解锁判断
使用方法
脚本镜像
bash <(curl -L -s https://dl.233.mba/d/sh/checkmedia.sh)
使用脚本前请确认curl已安装
bash <(curl -L -s check.unlock.media)
只检测IPv4结果:
bash <(curl -L -s check.unlock.media) -M 4
只检测IPv6结果:
bash <(curl -L -s check.unlock.media) -M 6
指定检测的网卡名称:
bash <(curl -L -s check.unlock.media) -I eth0
选择脚本语言为英文:
bash <(curl -L -s check.unlock.media) -E
或者直接运行以下Docker命令 (兼容ARM架构)
docker run –rm -ti –net=host lmc999/regioncheck && docker rmi lmc999/regioncheck
LovelyHaochi大佬的流媒体解锁测试脚本
特点:支持多个流媒体的ipv4与ipv6解锁情况
bash <(curl -sSL “https://dl.233.mba/d/sh/media_test.sh”)
图片[38]-个人常用VPS指令&脚本-仙人小站
部分截图
zhanghanyun大佬的回程线路测试脚本
Github:https://github.com/zhanghanyun/backtrace
curl https://raw.githubusercontent.com/zhanghanyun/backtrace/main/install.sh -sSf | sh
镜像:
curl https://dl.233.mba/d/zhanghanyunhuichengceshi.sh -sSf | sh
图片[39]-个人常用VPS指令&脚本-仙人小站
nanqinlang大佬的回程测试脚本
特点:支持选择节点测试,四网快速测试,手动输入IP测试三种模式
Github:https://github.com/nanqinlang-script/testrace
图片[40]-个人常用VPS指令&脚本-仙人小站
部分截图
脚本
wget https://raw.githubusercontent.com/nanqinlang-script/testrace/master/testrace.sh && bash testrace.sh
镜像 (国内机器或ipv6 only请使用这个)
wget https://dl.233.mba/d/sh/testrace.sh && bash testrace.sh
宝塔一键挂载硬盘脚本
特点:自动挂载至/www,方便快捷。支持Centos、Ubuntu、Debian、Fedora系统
官方BBS:https://www.bt.cn/bbs/thread-3187-1-1.html
图片[41]-个人常用VPS指令&脚本-仙人小站
Centos系统请使用以下命令:
yum install wget -y && wget -O auto_disk.sh http://download.bt.cn/tools/auto_disk.sh && bash auto_disk.sh
Ubuntu系统请使用以下命令:
wget -O auto_disk.sh http://download.bt.cn/tools/auto_disk.sh && sudo bash auto_disk.sh
Debian系统请使用以下命令:
wget -O auto_disk.sh http://download.bt.cn/tools/auto_disk.sh && bash auto_disk.sh
腾讯云删除云镜监控
直接复制粘贴全部到SSH窗口即可
sudo -i
systemctl stop tat_agent
systemctl disable tat_agent
/usr/local/qcloud/stargate/admin/uninstall.sh
/usr/local/qcloud/YunJing/uninst.sh
/usr/local/qcloud/monitor/barad/admin/uninstall.sh
rm -f /etc/systemd/system/tat_agent.service
rm -rf /usr/local/qcloud
rm -rf /usr/local/sa
rm -rf /usr/local/agenttools
rm -rf /usr/local/qcloud
process=(sap100 secu-tcs-agent sgagent64 barad_agent agent agentPlugInD pvdriver )
for i in ${process[@]}
do
for A in $(ps aux | grep $i | grep -v grep | awk ‘{print $2}’)
do
kill -9 $A
done
done
FunctionClub大佬的内存检测脚本
检测VPS真实可分配内存,适用于检测VPS超售情况
图片[42]-个人常用VPS指令&脚本-仙人小站
CentOS / RHEL:
yum install wget -y
yum groupinstall “Development Tools” -y
wget https://raw.githubusercontent.com/FunctionClub/Memtester/master/memtester.cpp
gcc -l stdc++ memtester.cpp
./a.out
Ubuntu / Debian
apt-get update
apt-get install wget build-essential -y
wget https://raw.githubusercontent.com/FunctionClub/Memtester/master/memtester.cpp
gcc -l stdc++ memtester.cpp
./a.out
VPS常备小命令
用户权限与管理 作用:切换到 root 用户,并保持 root 环境变量 命令:sudo -i 作用:切换到 root 用户,保持完整环境 命令:sudo su - 作用:以 root 权限执行命令 命令:sudo作用:显示当前用户名 命令:whoami 作用:查看当前用户 ID 和组信息 命令:id 作用:显示当前用户所属组 命令:groups 作用:修改当前用户密码 命令:passwd 作用:新增用户 命令:adduser 作用:删除用户及家目录 命令:userdel -r 作用:将用户添加到组 命令:usermod -aG 作用:查看当前用户登录信息 命令:w 作用:查看最近登录用户 命令:last 作用:锁定用户 命令:usermod -L 作用:解锁用户 命令:usermod -U 作用:切换用户 命令:su - 系统信息 作用:查看系统内核信息 命令:uname -a 作用:查看操作系统版本 命令:cat /etc/os-release 作用:查看系统运行时间和负载 命令:uptime 作用:查看主机名 命令:hostname 作用:查看磁盘空间使用情况 命令:df -h 作用:查看指定目录大小 命令:du -sh 作用:查看内存使用情况 命令:free -h 作用:实时查看进程、CPU、内存占用 命令:top 作用:增强版 top,需要安装 命令:htop 作用:查看系统最近启动日志 命令:dmesg | tail -n 50 作用:查看 CPU 信息 命令:lscpu 作用:查看硬盘信息 命令:lsblk 作用:查看内核模块 命令:lsmod 作用:查看系统时间 命令:date 作用:查看时区信息 命令:timedatectl 作用:查看开机时间 命令:who -b 文件与目录操作 作用:列出目录内容,带大小和可读格式 命令:ls -lh 作用:切换目录 命令:cd /path 作用:显示当前目录路径 命令:pwd 作用:创建目录(包含上级目录) 命令:mkdir -p 作用:强制删除目录及其内容 命令:rm -rf 作用:复制文件或目录 命令:cp -r 作用:移动或重命名文件或目录 命令:mv 作用:新建空文件 命令:touch 作用:查看文件内容 命令:cat 作用:分页查看文件内容 命令:less 作用:查看文件前 20 行 命令:head -n 20 作用:查看文件后 20 行 命令:tail -n 20 作用:按名称查找文件 命令:find /path -name " " 作用:文件内容搜索 命令:grep "pattern" 作用:比较两个文件内容 命令:diff 作用:显示文件前 100 行 命令:head -n 100 作用:显示文件后 100 行 命令:tail -n 100 作用:复制文件内容到剪贴板(Linux xclip) 命令:xclip -sel clip < file> 网络与端口 作用:测试目标主机连通性 命令:ping 作用:查看 HTTP 响应头 命令:curl -I 作用:下载文件 命令:wget 作用:查看网络连接和端口占用 命令:netstat -tulnp 作用:查看网络连接和端口占用(替代 netstat) 命令:ss -tulnp 作用:路由追踪 命令:traceroute 作用:DNS 查询 命令:dig 作用:查看网络接口信息 命令:ifconfig 或 ip addr 作用:查看公网 IP 命令:curl ifconfig.me 作用:远程拷贝文件 命令:scp user@host:/path 作用:远程同步文件 命令:rsync -avz user@host:/path 作用:测试端口是否开放 命令:nc -zv 作用:测试端口连接 命令:telnet 软件管理(Debian/Ubuntu) 作用:更新软件源列表 命令:apt update 作用:升级所有软件包 命令:apt upgrade -y 作用:安装软件 命令:apt install 作用:卸载软件 命令:apt remove 作用:自动删除无用依赖 命令:apt autoremove -y 作用:查看已安装软件包 命令:dpkg -l 作用:搜索软件包 命令:apt search 作用:查看软件包信息 命令:apt show 软件管理(CentOS/RHEL) 作用:更新软件包 命令:yum update -y 作用:安装软件 命令:yum install 作用:卸载软件 命令:yum remove 作用:查看已安装软件包 命令:rpm -qa 作用:搜索软件包 命令:yum search 作用:查看软件包信息 命令:yum info 服务与进程 作用:查看服务状态 命令:systemctl status 作用:启动服务 命令:systemctl start 作用:停止服务 命令:systemctl stop 作用:重启服务 命令:systemctl restart 作用:开机启动服务 命令:systemctl enable 作用:取消开机启动服务 命令:systemctl disable 作用:查看当前运行的进程 命令:ps aux 作用:实时监控进程 命令:top 作用:增强版 top 命令:htop 作用:杀掉指定进程 命令:kill 作用:强制杀掉进程 命令:kill -9 作用:按进程名杀掉进程 命令:pkill 压缩与解压 作用:压缩目录成 tar.gz 命令:tar -czvf file.tar.gz folder/ 作用:解压 tar.gz 文件 命令:tar -xzvf file.tar.gz 作用:解压 tar.bz2 文件 命令:tar -xjvf file.tar.bz2 作用:压缩成 zip 命令:zip -r file.zip folder/ 作用:解压 zip 文件 命令:unzip file.zip 日志与监控 作用:查看系统日志 命令:journalctl -xe 作用:实时跟踪日志 命令:tail -f /var/log/syslog 作用:实时跟踪日志(CentOS) 命令:tail -f /var/log/messages 作用:每 5 秒刷新运行命令结果 命令:watch -n 5 'command' 作用:查看磁盘 I/O 状况 命令:iostat 作用:实时查看内存和 CPU 命令:vmstat 5 网络调试 作用:连续 traceroute + ping 命令:mtr 作用:启动带宽测试服务器 命令:iperf3 -s 作用:带宽测试客户端 命令:iperf3 -c 作用:测试端口是否开放 命令:nc -zv 作用:端口连接测试 命令:telnet 计划任务与定时 作用:编辑当前用户定时任务 命令:crontab -e 作用:查看定时任务 命令:crontab -l 作用:查看系统定时器 命令:systemctl list-timers 磁盘与分区管理 作用:列出磁盘与分区 命令:lsblk 作用:查看磁盘分区表 命令:fdisk -l 作用:挂载分区 命令:mount /dev/sda1 /mnt 作用:卸载分区 命令:umount /mnt 作用:查看磁盘使用情况 命令:df -h 作用:查看目录大小 命令:du -sh /path 其他常用 作用:查看系统时间 命令:date 作用:管理时间和时区 命令:timedatectl 作用:查看环境变量 PATH 命令:echo $PATH 作用:设置环境变量 命令:export VAR=value 作用:查看历史命令 命令:history 作用:定义命令别名 命令:alias ll='ls -lh'


评论前必须登录!
注册